Students management in a course (learningCloud)
Students who you enrol in a course are the recipients of the sessions corresponding to the activities in that course. In addition, remember that, if it is an auto-enrolment course, other students can enrol freely and that students may also request their enrolment if you have marked that option when creating the course.
To manage students of a course you will always act from the "Students" tab of the details of the course in question.

From the "Students" tab, we can:
- Enrol students in a course
- Import students to a course
- Export students from a course
- Exclude students from a course
- Consult the progress of students in a course
Enrolling students in a course
- Go to "Courses" and click on one of them.
- Select the "Students" tab.
- Click on "Enrol students".
- Mark the students you want to add to the list and click on "Enrol those selected".
If you want to enrol all the students of a large group (several pages), except a few of them:
- Go to "Courses" and click on one of them.
- Select the "Students" tab.
- Click on "Enrol students".
- Perform an "Advanced search" by group and click on "Show results". Select "All" the results and deselect those you do not want to include. You can move between pages and deselect or select the students you wish to enrol among those in the search result, without losing the selection, and then enrol all the selected ones, not only those in the current page. On the other hand, if you select "Current page", only the students in the page from which you perform the selection will be marked.
- Click on "Enrol those selected".
Importing students to a course
The platform allows you to speed up the registration process of users in a course through massive import. Therefore, instead of adding the users one by one you can upload an Excel document to enrol them.
- Go to "Courses" and click on one of them.
- Select the "Students" tab.
- Click on "Import students".
Exporting students from a course
The platform allows the creation of an Excel document with a list of the students who are enrolled in a course.
- Go to "Courses" and click on one of them.
- Select the "Students" tab.
- Click on "Export Students" and open or save the document.
Excluding students from a course
If the course from which you want to exclude a student is already published, the student will receive a notification.
- Go to "Courses" and click on one of them.
- Select the "Students" tab.
- Mark the students you want to exclude and click on "Exclude those selected from the course".
Consulting the progress of the students in a course
You may be able to consult the progress of the students in a course. To do so:
- Go to "Courses" and click on the name that you want to consult.
- Select the "Students" tab.
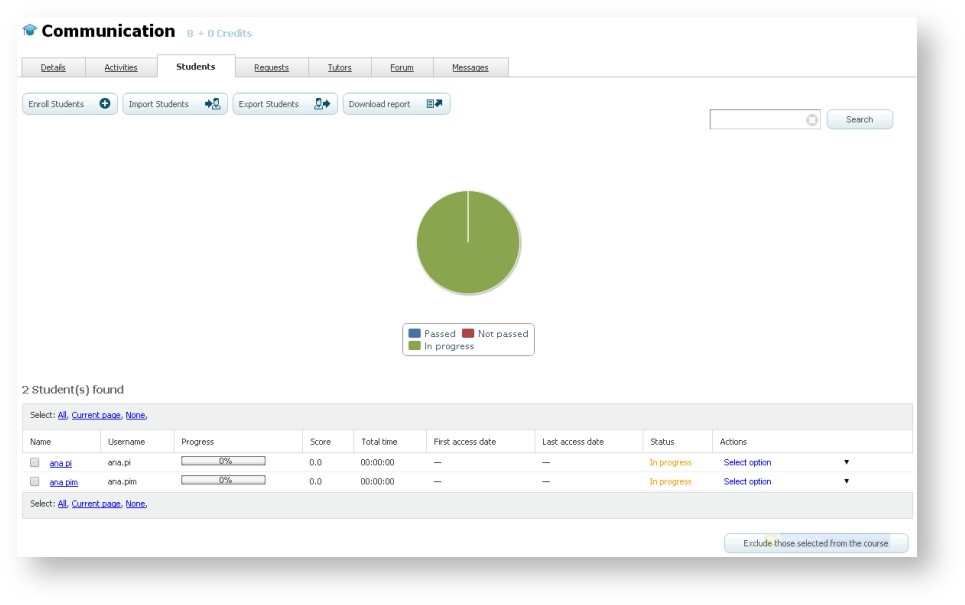
You will see an interactive graph above the list of students which represents the percentage of students in each of the possible statuses of the course. For example, you can click on "Not passed" and see the percentage of students who have not started any of the sessions of the course yet.
You will see the list of students below the graph and for each one of them:
- Progress bar: this bar shows the percentage of activities passed in this course, whether they are or not assessable and/or mandatory.
- Score: this column shows the average score that the student got on the course. This average is calculated on the basis of the assessable sessions, whether they are assessed by a trainer (Classroom, Exercise or Web conference), or automatically evaluated (SCORM Assessment or SCORM/AICC/Tin Can).
- Total time: it is the total time that the student spent on the course. This will only reflect the time of those SCORM Assessment or SCORM/AICC/Tin Can sessions which are configured to collect this information.
- First access date and end access date: this shows the date when the student accessed one of the sessions of the course for the first time and the last date when he did so.