FAQ: Importing plans and courses from Excel (admin)
Importing plans and courses from Excel allows us to launch quickly new plans and courses reusing existing activities. This is useful for companies that repeat similar trainings at different dates and locations.
As a general rule, we will carry out this task from the file exported from LMS Pack. This exported file has the exact structure that LMS Pack needs to carry out the importation, so we can modify data and use it to publish massively new courses and plans.
Let's see how to export plans and courses.
File export
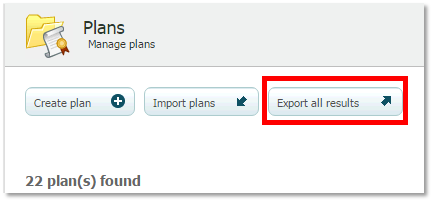
1. Go to "Plans" section.
2. Click on "Export plans".
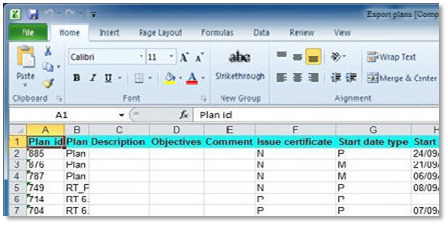
A file called "Export plans" will be downloaded.
This Excel file has four different tabs: “Plans”, “Courses”, “Activities” and “Legend”.
"Legend" tab is informative and the other three tabs show the different data recorded for each of the sections. In the tables below, we will see in detail /wiki/spaces/ML/pages/10420356, their description and the validations we must consider if we edit any value.
File import
After making changes in Excel, we may import the same file directly, publishing massively those plans and courses we have configured.
Remeber |
To import the Excel file:
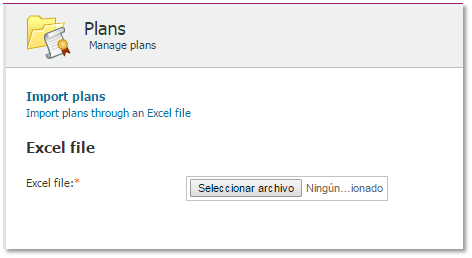
1. Go to "Plans" section.
2. Click on "Import Plans".
3. Select the Excel file that has been modified.
Application example
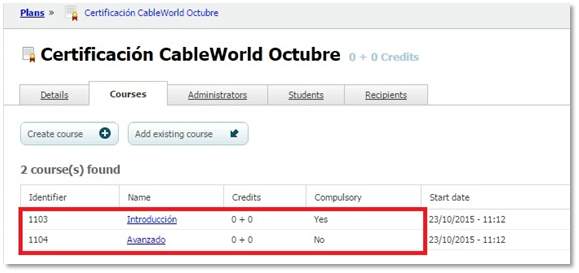
Imagine the company CableWorld is training its employees to obtain a compulsory professional certification and the company is arranging monthly calls. We have already published the “CableWorld October Certification” plan in learningCentral.
This certificate consists of a training plan including two courses, Introduction and Advanced.
Each course consists of several training activities that have already been added in LMS Pack.
In order to create massively similar plans in different locations and with different dates, we need to follow these steps:
1. Export plans file following the steps seen above.
2. Remove those plans, courses and activities that we will not need to avoid duplication errors during importation.
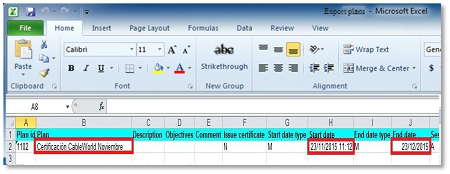
3. Edit fields as needed. In our case, “Plan” ─indicating the month─, “Start date” and “End date”.
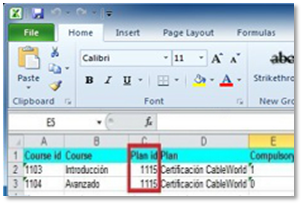
4. Change the “Plan ID” using the same in both Plans and Courses tabs. This is a temporary ID. When we add a plan, LMS Pack will automatically assign a definitive ID. Courses must be previously allocated to the plan we are editing, as existing courses may not be assigned to a new plan in LMS Pack.
We could take advantage of this importation to generate new courses based on other existing activities.
5. Import the Plans file following the steps we have seen above.
6. In our user notification area, we may verify that the process has been successful. If any issue arises during the process, we will also receive a notification.
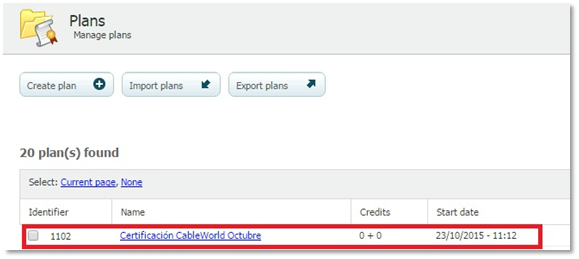
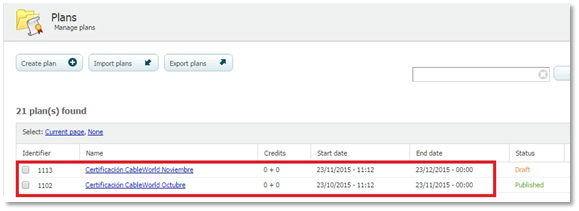
7. In the “Plans” list, we may find the newly generated plan. The status of the plan will be "Draft" or "Published" depending on whether we have set a course of the plan as "Published", since whenever a plan has a course in published status, the plan will be imported directly as published.
Information |
