5.10 Editing texts
A text is a basic component of any template in learningMaker.
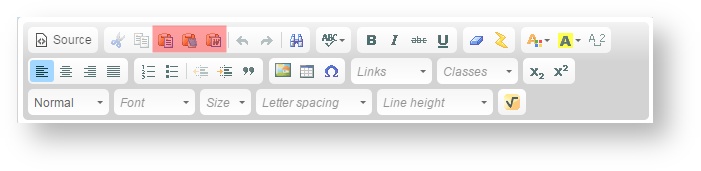
Unlike other components, the text is set and edited using a text edition panel similar to that provided by Microsoft Office.
This panel allows:
Pasting texts from other locations
Often, instead of typing a text, it is copied from another source (for example, Word, PowerPoint, etc.).
If this is the case, avoid to copy and paste a text directly from Word to learningMaker, since this can generate text format problems or even problems associated with the responsibility for the contents.
Use "Paste from word" option (it keeps formats such as bold and italics) or "Paste as plain text"
 option (it pastes a text as plain text and deletes any problematic source code).
Text basic format
Any basic format such as bold, italic, underline, colour, alignment, bullets or numbered lists, adding or reducing indentation, subscript and superscript, can be applied to texts.
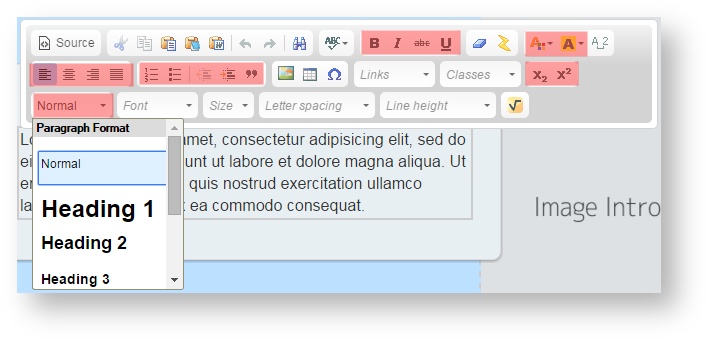
In addition, from "Paragraph format" drop-down menu, different header styles (Heading 1, Heading 2, Heading 3...) can be selected.
If you want to remove a text format (bold, italic...), click on . Click on
  to remove any other format such as indentation, lists, etc., in order to display the text as a plain text.
Creating links
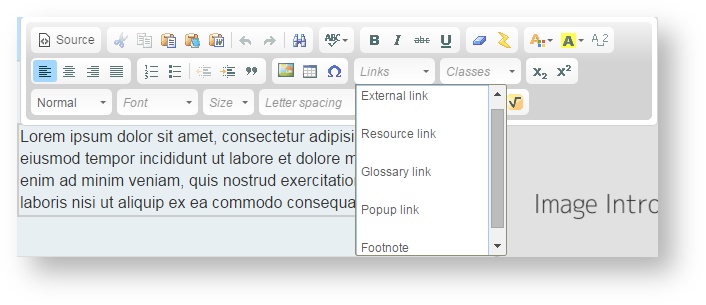
The text editor allows adding links to one or several words. To do this, click on the "Links" drop-down menu and select the type of link you want to generate:
- External link. A link to a web site.
- Resource link. It is very useful to link a word(s) with a resource, for example, a pdf document. We support files with the extensions pdf, zip, rar, 7z, ppt, pptx, pps, ppsx, doc, docx, xls, xlsx, odf, odt, odp and ods.
- Glossary link. Option available and functional only on "Multi-página" and "Express" templates. It allows linking a word(s) with a specific word included in a glossary (a kind of pop-up).
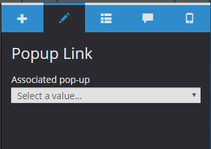
- Popup link. It allows linking a text with a pop-up. See section 5.6
Once a link type has been selected, we have to configure its properties from the properties tab in the components menu.


Creating tables
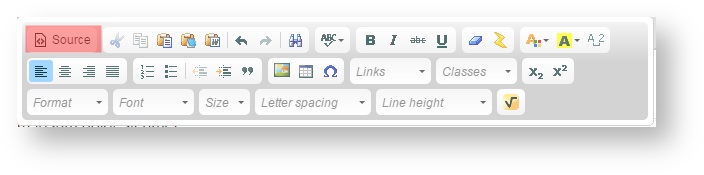
To create tables, click on  .
.
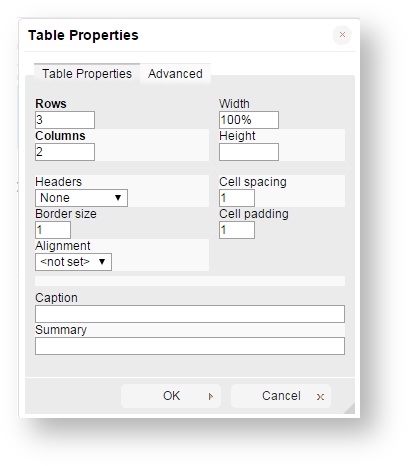
A panel that allows configuring the number of rows and columns of a table, its width (in pixels or percentage), height and other parameters, is displayed.
Once a table has been created, we can configure it by selecting a cell and right-clicking on it.
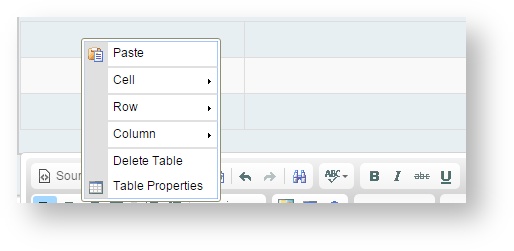
The following actions can be performed:
- Cells. Combining cells and applying specific properties to a cell (background colour, border colour or text alignment).
- Rows. Adding and deleting rows.
- Columns. Adding and deleting columns.
- Deleting the table.
- Changing general properties of the table.
Remember While working with Firefox, cells have to be configured one by one. However, while working with Chrome, several cells can be selected to apply them a format. |
Editing HTML source
To access the source code and to perform changes directly such as pasting code or adding a new code, click on "Source".
It is recommended to avoid overusing this functionality for not interfering with the template development by adding codes or CSS.
However, it is useful for:
- Copying and pasting the table code that we have created in other texts, especially if they are tables with specific formats (colour, configuration...).
- Adding a video embed code hosted in a streaming server (for example, YouTube).
The possibility of including HTML code directly on the content can help the author to include certain resources as tables or a YouTube link, but it has also its limitations to guarantee the responsive correct behaviour of the content.